Introduction
We're reaching a point where our purchases are not our own. More and more types of businesses are moving into the "high risk" category. They are censored by banks and payment processors like stripe and PayPal. We are actively being controlled, told what we can and cannot buy, who we can and cannot support.
People are losing the ability to make money on their work, their right to profit off of their speech and expression taken from them by the corporations who should be neutral 3rd parties that do nothing but facilitate the transactions. Instead these corporations make your business their business.
But there is another way. And it's easier than you might think.
The goal of this article.
This article is meant to help get people familiar with Monero and showing how it's various processes work, such as paying and getting paid for products and services. The goal is to provide as much detail as possible so that even those who have never worked with cryptocurrency before can hopefully understand what's going on.
This article will discuss the following topics. For convenience you can click on the topic to be directed to that section of the article.
-
Setting up a Monero Wallet using the Official Monero GUI software.
Estimated time to follow this step: 5 - 10 minutes -
Receiving payments directly in Monero (Receiving Direct Payments)
Estimated time to follow this step: 2 minutes. -
Receiving payments in most cryptocurrencies and get the payment in Monero with Trocador (Receiving Indirect Payments)
Estimated time to follow this step: 5 minutes. -
Pay for products/services directly using Monero. (Direct Payments)
Estimated time to follow this step: under 5 minutes.
Setting up a Monero Wallet.
While the following setup guide is aimed to be as easy and straightforward as possible it assumes you have basic knowledge of how to use a computer and how to get around your operating system (whether that be Windows, Mac, Linux, BSD, etc...).
First step is to download the wallet from the official Monero website: https://www.getmonero.org/downloads/ Go to that link to grab the latest version of the Monero Wallet for your operating system.
Best Practice Note: For best practices you should verify the binaries. You can find out how to do that for Windows (Beginner) or for Windows, Mac & Linux via Terminal (Advanced)
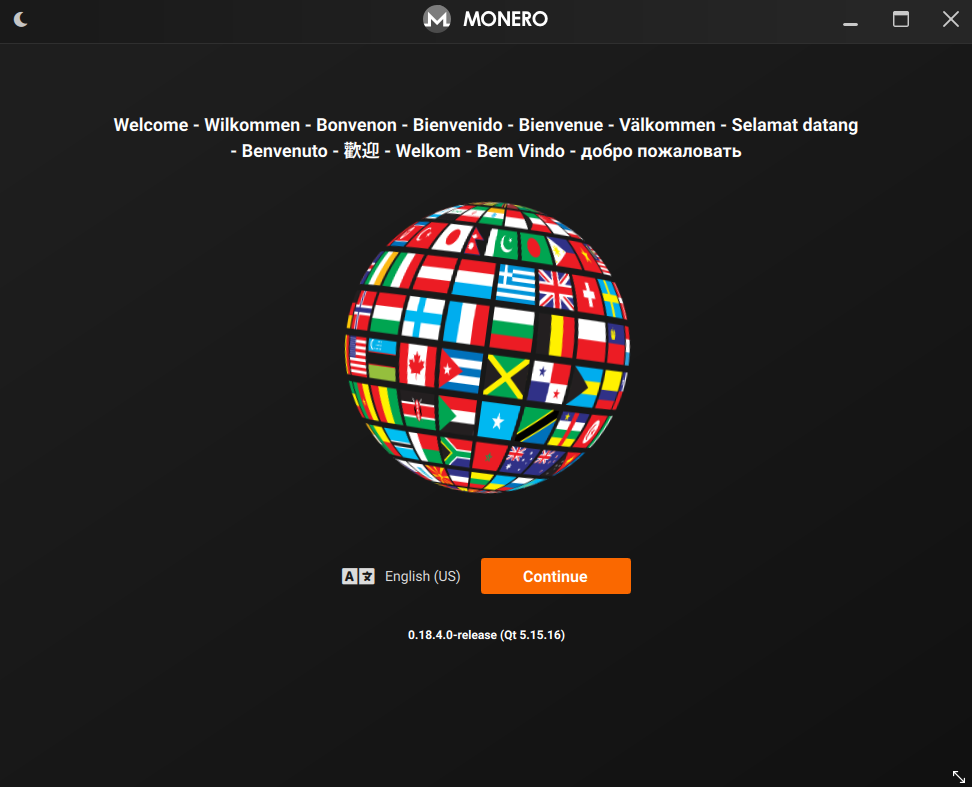
After first opening the Monero GUI software you will be greeted with this, select your language and click the orange continue button.
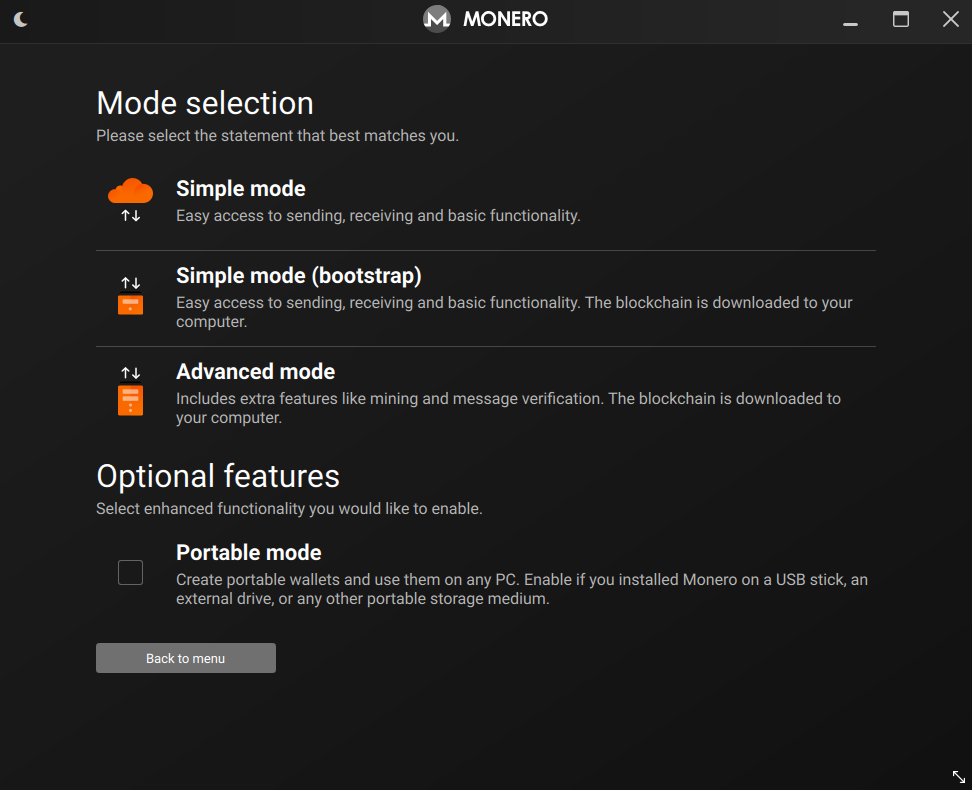
Next it will give you the above options, asking which mode you want to select. We're going to select Advanced, it's the best way to do the setup. I don't think anyone uses the simple mode.
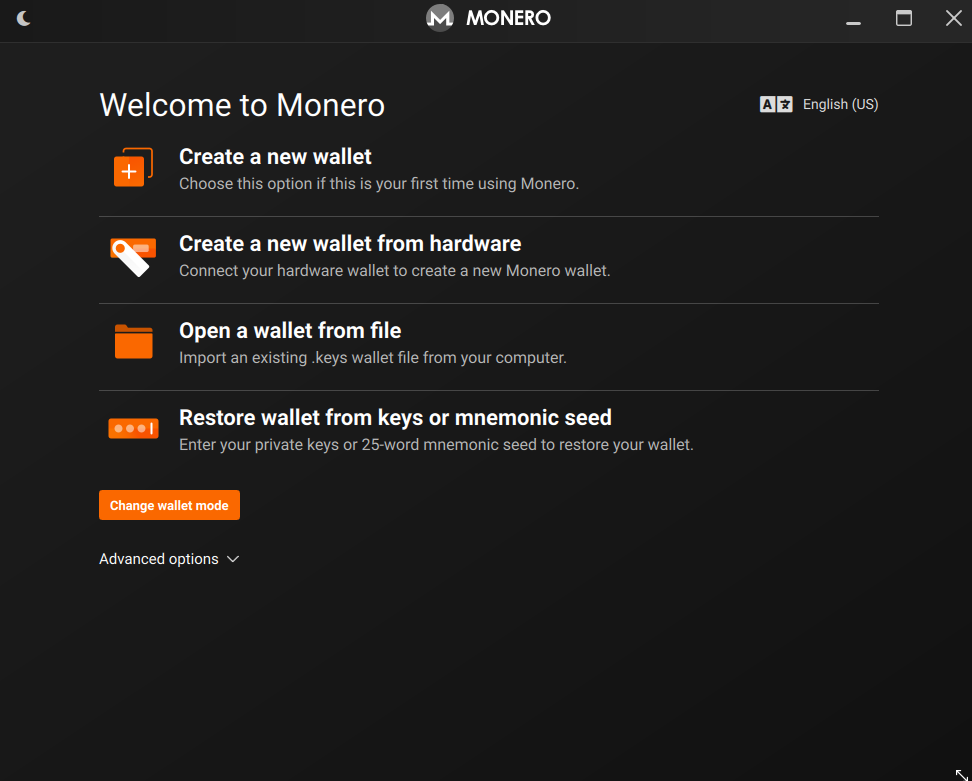
Now you'll be greeted with the following page. We'll be creating a new wallet today, but to open the wallet after creating it all you have to do is click "open wallet from file" and then navigate to the saved wallet file.

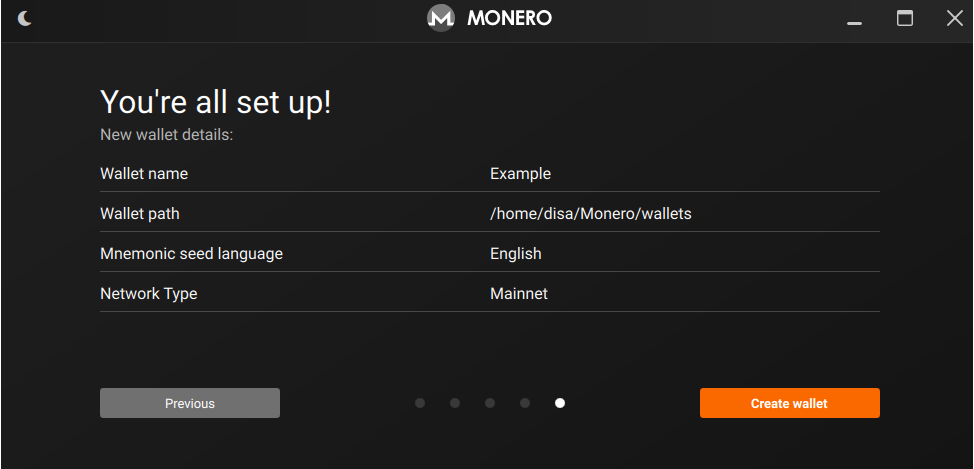
Next you'll pick a wallet name and choose the location on your computer you want to save the wallet file to. I'm leaving it as default for me, but feel free to change it to wherever you like. Make sure to pick a location you remember and backup your wallet file.
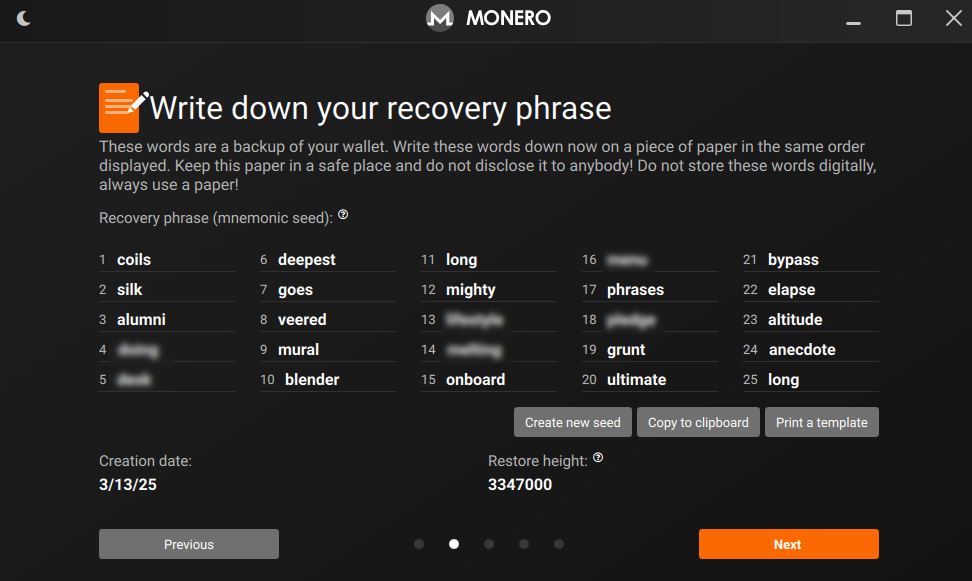
Now you will see your recovery phrase. If for any reason you lose your wallet file, this will allow you to restore your wallet. Write it down and save it in a safe location. Remember if this gets out, anyone can recover your Monero wallet, so it's best to store it securely as possible.
Note: Do not attempt to use this example seed to recover a wallet. This wallet is for example purposes only and should be considered completely compromised. Some of the words are blurred simply to help make sure no one mistakenly uses this example phrase.
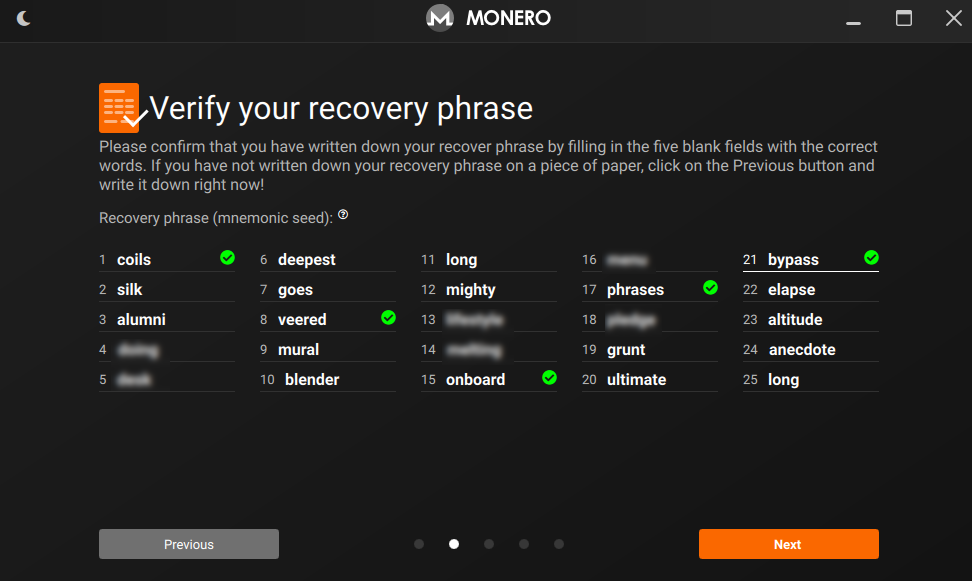
Next step is simply to verify your wallet phrase. 5 random words from your Wallet recovery phrase will become blank and you'll need to fill them in again. This is to ensure you were paying attention and that you did write it down somewhere. If you forgot to you can go back to the previous step.
Note: Do not attempt to use this example seed to recover a wallet. This wallet is for example purposes only should be considered completely compromised. Some of the words are blurred simply to help make sure no one mistakingly uses this example phrase.

Next give your wallet a password, you'll be asked to input this every time you open your wallet. It should be a long secure password or passphrase. In a worst case scenario this is the last line of defense if someone somehow managed to get access to your wallet file/recovery phrase. Ideally that would never happen if you secured it properly, but it's still highly recommended to use something good and secure here.
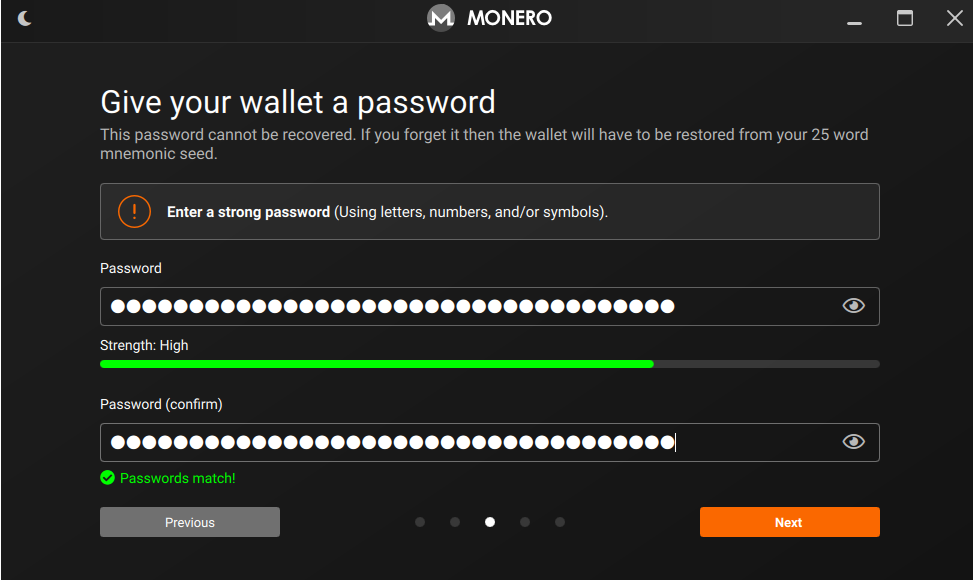
After picking a good secure password, you can proceed to the next step.
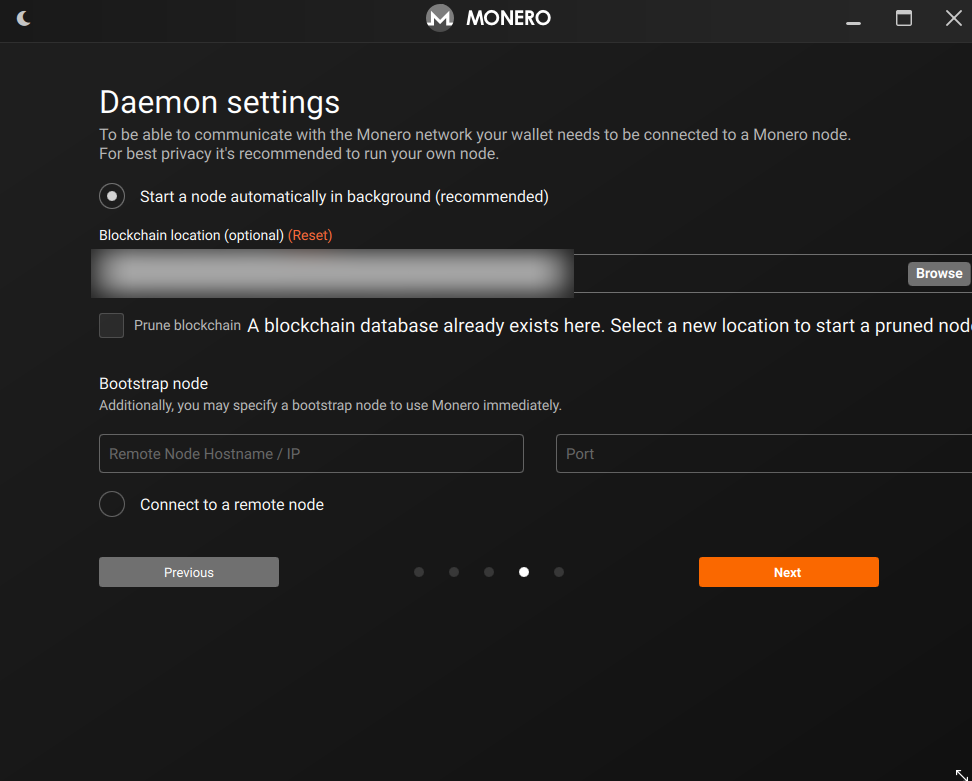
Next it's time to figure out the Daemon settings. This is where you pick between a local or remote node and configure that. Don't worry, it's easier than it sounds!
A local node is where you save the blockchain on your computer locally. Where as with a remote node you are connecting to a server. A remote node doesn't take up any space and syncs faster, but a local node is significantly more secure.
It is HIGHLY RECOMMENDED to use a local node if you have the storage. Remote nodes can compromise your privacy and even interfere with your transactions. You're essentially putting all your trust in a 3rd party.
A full node currently is around 230GB with a pruned node being closer to 50GB.
If you decide to use a local node you can tick the box "Prune Blockchain" which basically stores a smaller more lightweight version of the blockchain that takes up significantly less space. I already have a blockchain in the specified location, so that's why I get the "A blockchain database already exists" message.
If you, really want to use a remote node you can get a list of them at https://monero.fail/ just fill in the details of the node you decide on in the respective remote node fields. This is your final warning, a remote node is NOT advised.
Now your Monero Wallet has been created, however there is one more step.
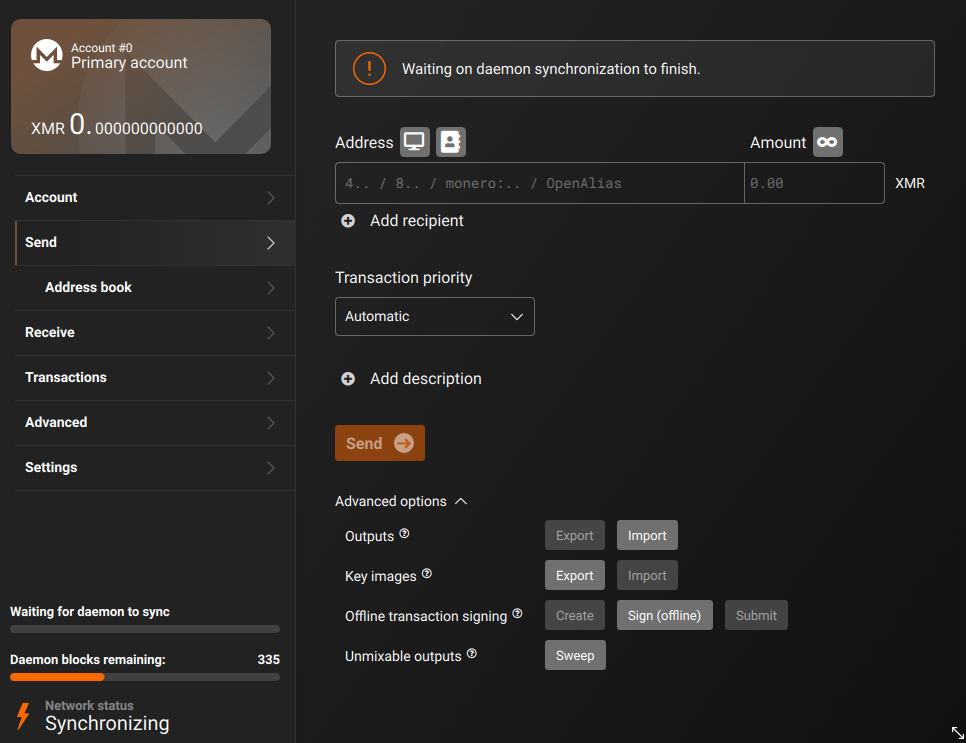
Once you're in, your wallet should look something like this. However you might notice on the bottom left you will have to wait to download the blockchain, which can take multiple hours for the initial sync. My blocks remaining are low because I already have a blockchain saved. Exact time depends on various factors such as internet speed and storage type. A good NVME can sync the blockchain fairly quickly, where as an SSD can take a few hours and an HDD, well, you'll be waiting awhile. However once you're caught up consecutive syncs will be much faster (depending on how long it has been since you last synced the blockchain.)
Once the blockchain is synced, you're done! You've successfully setup a Monero wallet and can send & receive payments!
Receiving Payments!
Now that you have a wallet and the blockchain is fully synced, you can start receiving payments!
Receiving Direct Monero Payments
This section will go through how to receive Direct Monero payments. Meaning anyone who has a Monero wallet can send you Monero!
Let's get started!
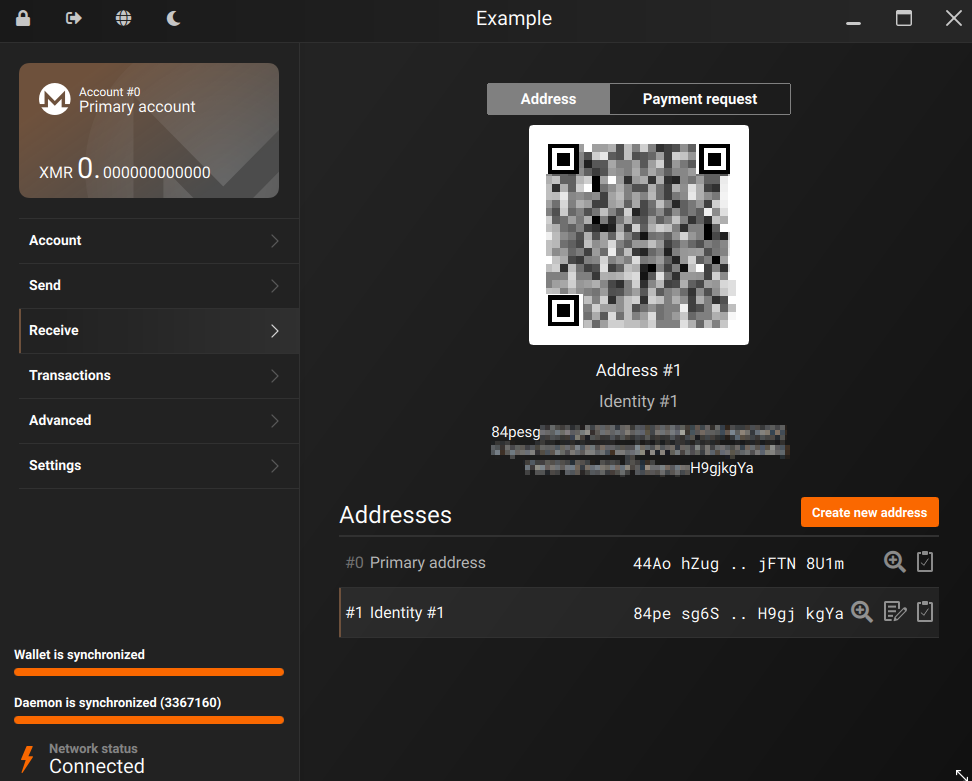
In your Monero Wallet click on the "Receive" tab to the left of the GUI.
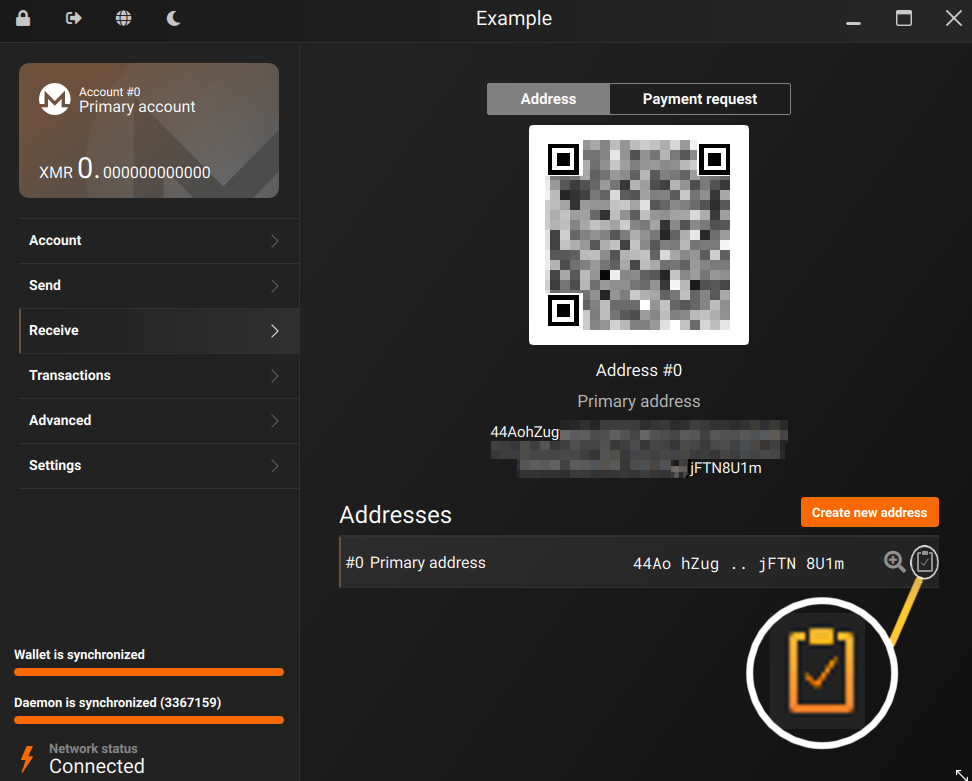
You'll be greeted with something that looks roughly like this. This is where it shows all your Monero addresses for this account. By default it will select the top address and show you a QR Code as well as the entire address below it for the selected item.
To copy the address click the little clipboard icon to the left of the address you want to copy. For the convenience of visibility I've made a little bubble zooming in with a line leading to the actual icon.
You can easily create multiple alias addresses for this wallet account by clicking the "Create New Address" button. This will make a new address for this account on this wallet. Let's create a new address real quick to show how that works.
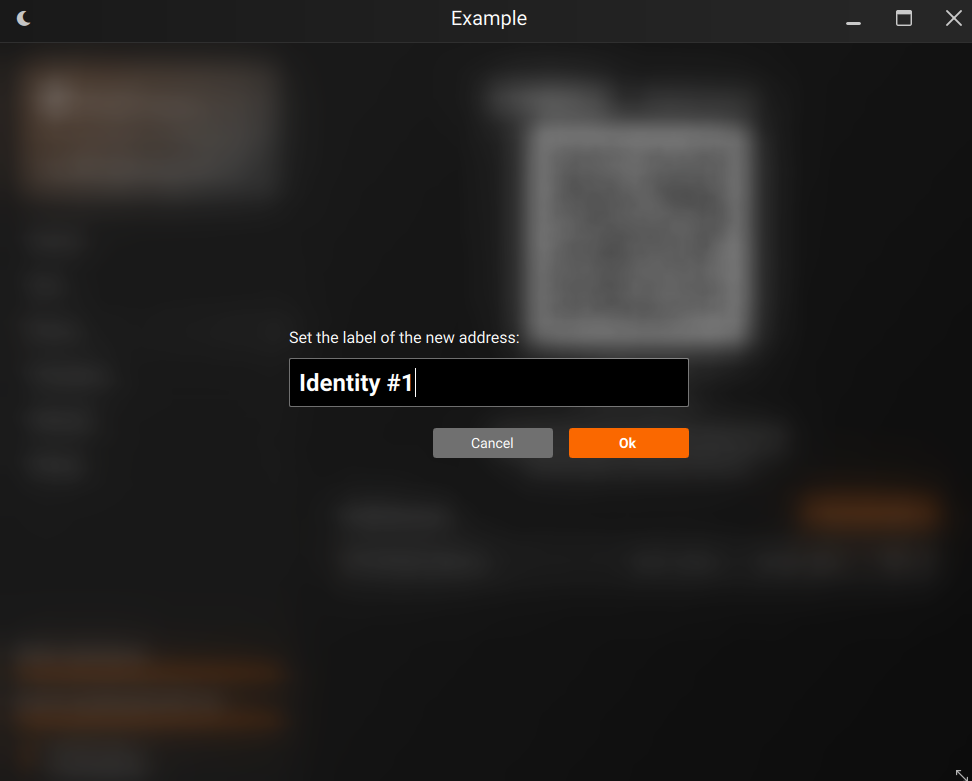
After clicking "Create New Address" the following prompt will show up asking you to name your new address. This label is entirely client-side only you will be able to see it. Here we're naming it "Identity #1". So you could have multiple addresses for multiple online projects or multiple online identities without them linking back to eachother. While nobody can use your Monero address to see how much money you have, who you sent money to or who sent money to you, if you have the same Monero address listed across multiple online identities, that's a pretty easy way to connect those two identities together. It's like using the same public email for multiple, otherwise unlinked identities.
Your alias address should look something like this: 8BgWgTBqdFabCQom16f6ty4YCEGK9qrNvVvoHLh4eDt98LAXH77PkuydYZYs7U7PvN8qeNvgEPuYt8LxpNc7LRVsN1G4ygu (This is one of our addresses)
Primary addresses start with a 4 and aliases start with an 8
There's only 1 primary address per-wallet, it's recommended to use aliases for accepting payments.
That's it!
All you have to do to get paid is to paste your Alias Address somewhere people can easily copy and paste it, or scan it, in the case of a QR code.
Receive Most Crypto, Get Monero! (Indirect Payments)
This method we will discuss how you can get paid in Monero, even if the person doesn't have Monero specifically! So, let's say someone doesn't specifically have Monero, but they have Bitcoin, Litecoin, Doge or some other currency. So long as the crypto they have isn't too obscure this method should work!
This allows people to pay with almost any cryptocurrency while you still receive the payment in Monero! This lets you broaden your reach from just Monero users to almost anyone with crypto, without having to deal with juggling multiple cryptocurrency wallets.
A little about Trocador
So how we'll be doing this is by using a 3rd party service called Trocador. They're the ones who will actually deal with swapping from the customer's currency to Monero, making the experience seemless for the payer and the person being paid!
The great thing about Trocador is, you don't need an account and they charge no extra fee! They just take part of the fee that the actual swap/exchange takes (which is selected by the person making the payment.) The fee of exchanges/swaps varies depending on which one the payer chooses. But they are usually small and almost always are far lower than the fees taken by services like Paypal & Stripe.
Let's get started!
So, Trocador actually makes this super easy, to get started, just to go to their Payment Generator Webpage and fill out the information.
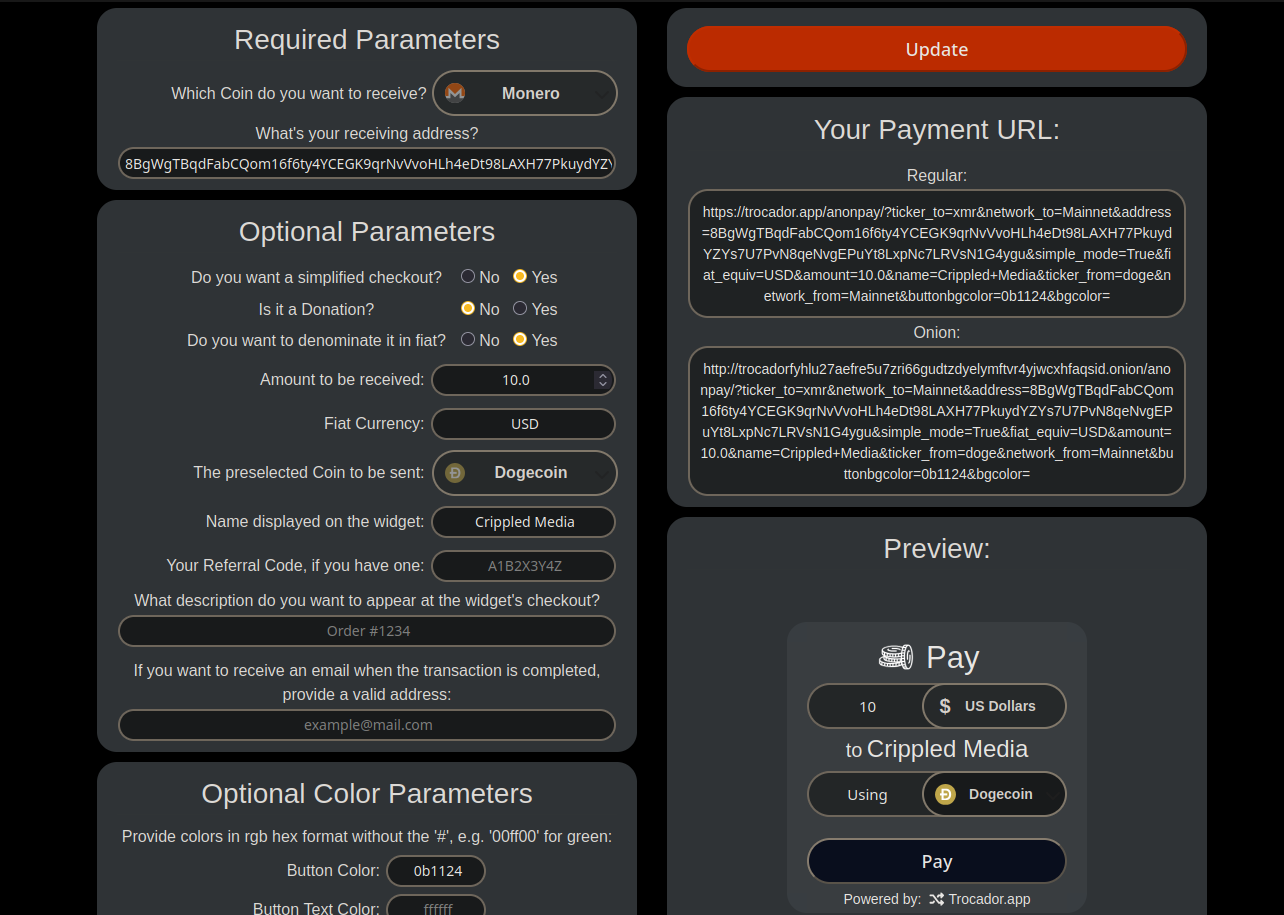
This is my pre-filled Payment Generator page. It might seem overwhelming at first, but let's take it step by step. Whether you have a question on what a few of the options do, or if you need all of them explained, you should be able to use the list below to get a general idea.
The right side shows us a preview of how the widget will look and various ways to use it, such as direct links and iframes. But the left side is where all the actual options are, so we'll be going through those first.
Which coin do you want to receive?: The cryptocurrency you will receive the payment in. We'll select Monero (which for me was the default.)
What's your receiving address?: The address you will be getting the crypto sent to. You should put one of your Monero alias addresses in here.
Do you want to simplify checkout?: If you click yes the exchange/swap will be chosen automatically requiring less user intervention. If you click no they will have to choose one. You can pick whichever one you feel is best, for demonstration purposes I'll be choosing yes.
Is this a Donation?: If yes the final widget will allow the user to input any amount. Where as if you click no you'll pick how much they need to pay.
Do you want to denominate in fiat?: If donation is set to no this will let you pick the amount the user pays in fiat values (USD, EUR, GBP, etc...) even though the person is paying in cryptocurrency.
Amount to be received: If donation is set to no this is where you would put how much you will be paid. If you selected to denominate in fiat this number will be in fiat, otherwise it will be in whatever coin you picked as the "preselected Coin"
The preselected Coin to be sent: The coin that will be selected by-default (can be changed to any supported coin by the user.) I chose Dogecoin, because it's minimum amount is quite low and it's price is relatively stable. USDC or USDT would also be good for this, due to their value being pegged to the U.S dollar.
That's all the important options. Everything else is for customization, such as the name that will show up in the widget (I put crippled media) and color customization so that you can make the widget match a specific theme if you desire.
Once you are done filling everything out, click the orange "Update" button at the top right corner. The page will refresh and everything will update to match your preferences. On your right you will now see links which can be shared, one is for the clearnet and below it is the onion (if you're sharing through Tor.) Below those is a preview of how your widget will look when someone clicks your link or when it's embedded into a webpage and if you scroll all the way down on the right you will see an HTML code block with an Iframe you can embed into a webpage.
Sending Monero Payments
Now we'll cover how to actually pay for something with Monero, we'll go through paying someone directly with Monero, like how you might use the "Friends and Family" option to pay in Paypal and we'll also go through the process of paying for various actual products/services online using Monero. That way you'll be prepared for most situations that you will come across when using Monero as payment!
Sending Monero Directly
All you need in order to send Monero from your wallet to someone else, is a Monero Wallet with some Monero in it, A fully synced blockchain and the Monero address you want to send to.
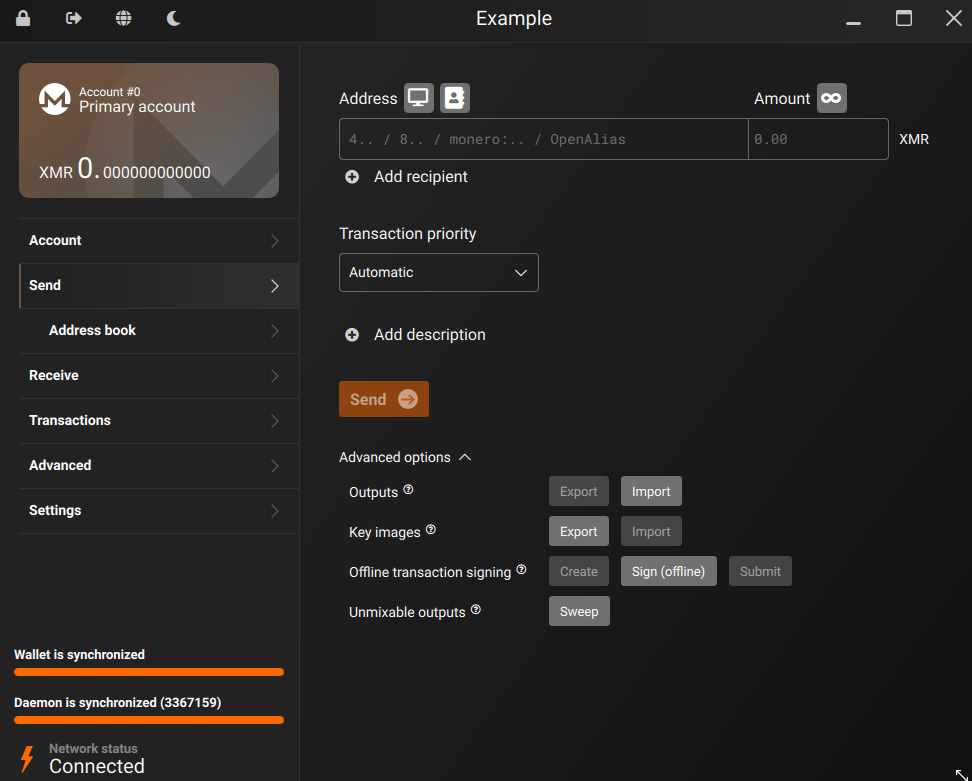
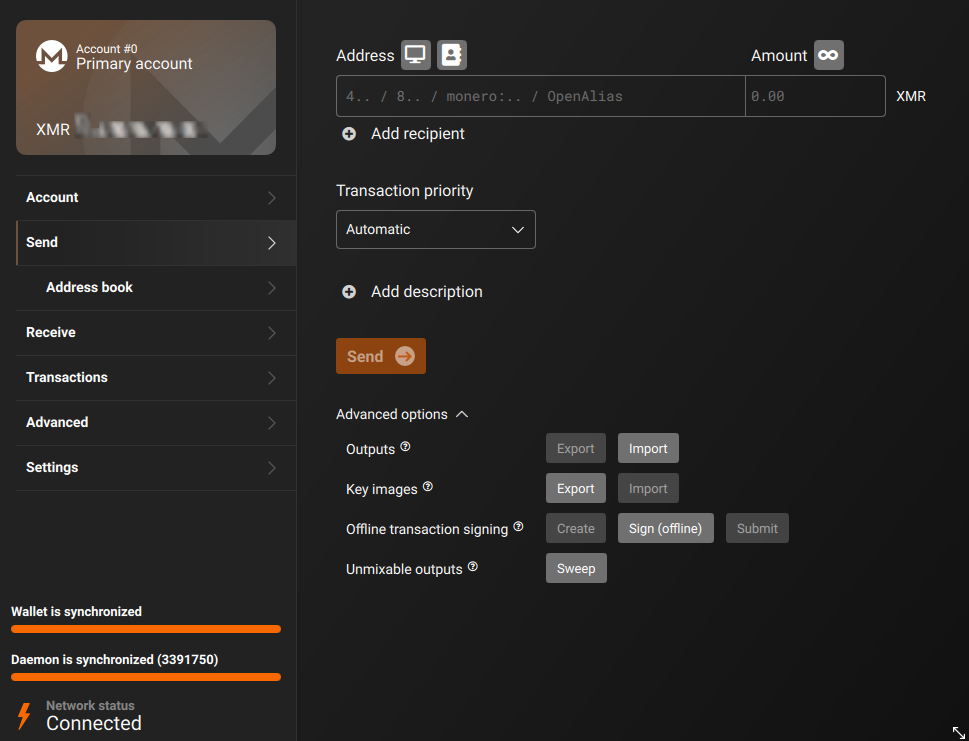
Go to your Monero GUI application and open the Send tab. It should look something like the image below.
Going through the options
At first glance, it looks like there might be a lot going on here, but we're going to be disregarding everything underneath the "advanced options" dropdown. You'll never have to use any of those for typical use. I've never needed to use them.
That leaves us with significantly less options to work with.
The important options:
The first input field is the "Address" field, this is where you'll put the Monero address you want to send funds to.
Next to that is the "Amount" field, this is where you'll put in the amount of Monero that you want to send.
Below that is the "Transaction Priority" drop down you can set this to Automatic, Slow, Normal, Fast and Fastest. This sets how quickly your transaction will be processed on the blockchain, this also calculates the fee it will cost to make the transaction. Higher priority results in the transaction being processed faster, but also increases the fee required to make the transaction. Slow has a 0.2x fee, Normal has a 1x fee, Fast has a 5x fee and Fastest results in a whopping 500x fee.
It's almost never necessary to change the transaction priority above automatic. From my experience the speed difference is usually negligible, especially compared to the fee increase.
The other options:
So, you might've noticed the above mentioned options aren't the only options available. There are a few buttons here and there. These buttons are optional and mostly for convenience purposes. But I'll explain them anyway so you know what they do, if you ever should need them.
Above the "Address" field there are two square buttons one that looks like a computer monitor and the other to the left of it looks like a binder with a silhouette on it.
The button that looks like a computer monitor scans your screen for Monero addess QR Codes, if there are any, it'll auto-fill the address field for you with the resulting Monero address.
The button directly next to it that looks like a binder with a silhouette on it opens your "Address Book" (located directly below the send tab on the left). From there you can select any of the Monero addresses you have saved in your address book and it will auto-fill the address field with that address.
Directly below the "Address" field is a text-button that says "Add recipient" clicking this will add another set of empty "Address" and "Amount" fields. If you have multiple payments you need to make, you can do them all at once instead of having to do them one at a time.
Directly above the "Amount" field located to the right of the "Amount" label is another square button with an infinity icon on it. Clicking this button will put (all) into the amount field, if you continue with the transaction you will send all spendable funds (minus transaction fee) in that account to the address input to the address field. This can be useful if you only have a few bucks in an account and want to donate/give all of it to someone without having to worry about the transaction fee.
And finally, below the "Transaction Priority" dropdown there's another text-button that says "Add description". Clicking this will create an additional input box for you to label the transaction however you'd like. This description is entirely local, only you will be able to see it. You could use this to reference what you paid for, why you paid, or some other information that you might find useful that you wish to save alongside the transaction for future reference.
Making an example transaction.
Now that we've explained what all the options do and you hopefully have a better idea of what we're dealing with, I'm going to make an example transaction for demonstration.
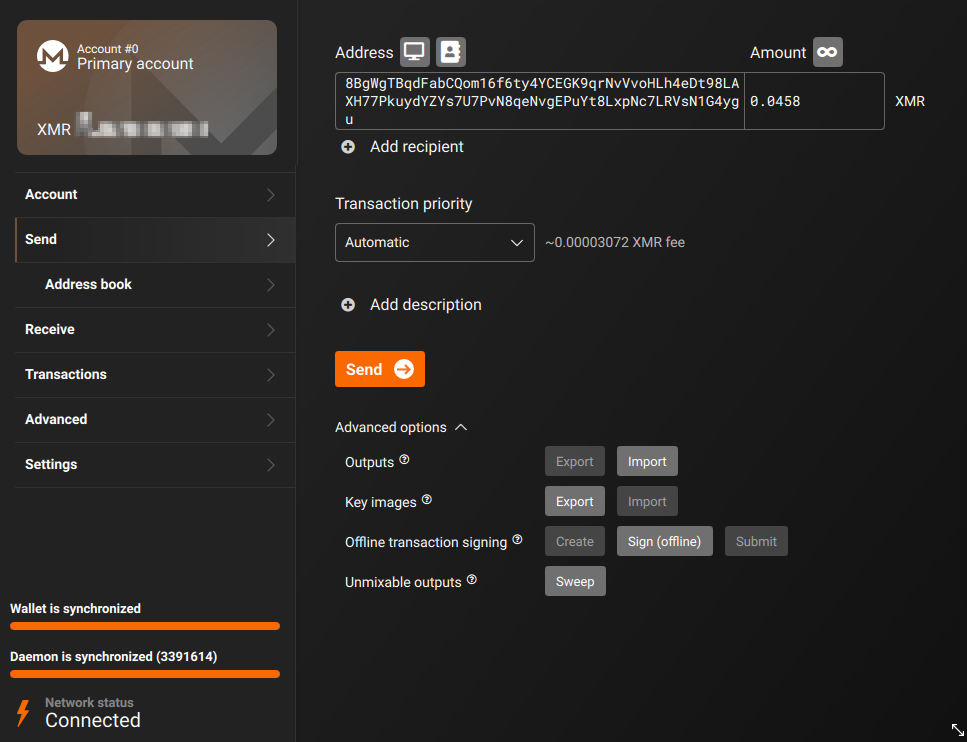
As you can see in the screenshot, I am about to send 0.0458 XMR (currently around $10 USD) to our donation address. With the Transaction Priority set to "Automatic", our transaction fee for this transaction will be 0.00003072 XMR, which is roughly half a cent of USD.
After looking this over and double checking everything is correct, I'll hit send to start creating the transaction. Which will look something like this.
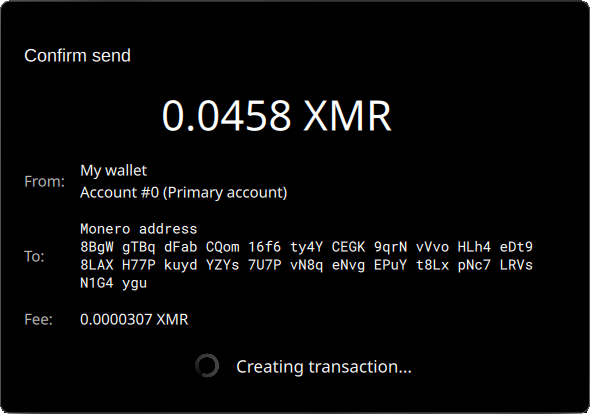
A confirmation dialog similar to the above image will show up in the center of your Monero GUI. It'll give you details such as the wallet you are sending from, the account in the wallet that you are sending from, the Monero address you are sending to and finally the estimated fee. It might take awhile to create the transaction, it can sometimes take a few minutes.
After the transaction is created, the confirmation dialogue will update and give you the final details of the transaction. It'll look something like this.
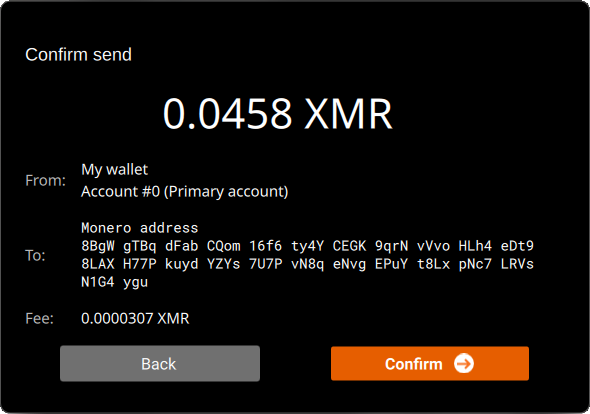
This is the finalized details of the transaction and it is your last chance to confirm everything is correct before finalizing and actually sending the funds. Take a minute to make sure everything is correct.
If everything is correct, hit confirm to finalize the transaction and send it out.
After hitting confirm the dialog box will update almost immediately for the final time and will show your Transaction ID.
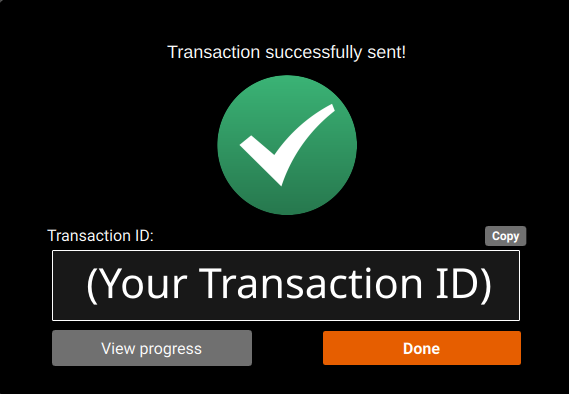
This box will give you your Transaction ID and give you the option to copy it. This Transaction ID can be used by the other party to verify payment and to easily find your transaction in their wallet. But it's generally not needed unless a problem arises. And you can always get a transaction's ID in the transactions tab if you ever need it later.
That's it!
Now you just have to wait for your transaction to be confirmed on the blockchain. If you are paying for a service or product via an automated system, it'll probably take a few minutes to note they have received the payment and that they are just awaiting confirmations. They usually wait until a few confirmations before finalizing the payment and marking it as completed. This depends entirely on whoever is running the service. Some mark payments as complete after only 1 confirmation, others wait for 2 or 3 and some wait for 10.
If you are just sending to another person, it's unlikely they will wait for more than a couple confirmations, if any. Though that would ultimately depend on the person.
Monero Resources
Here I'm going to go through a list of resources which I have personally tested as of June 24th 2025 and use currently. This will be a list of services/resources to help you use Monero even in situations where you thought you might not be able to.
Swap Payments
Trocador: https://trocador.app
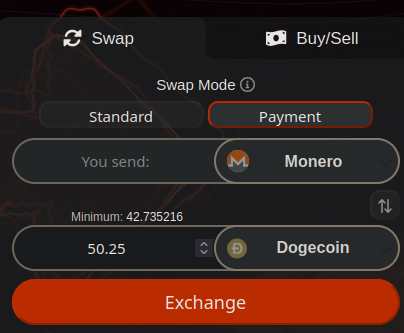
Trocador is a platform which allows you to swap cryptocurrencies and buy giftcards using cryptocurrencies. If you want to buy something with basically any cryptocurrency, but you only have Monero, you can go to there swap section and select the "Payment" tab. This lets you put in the exact amount of basically any other cryptocurrency you need to pay with, send them Monero and they'll swap it for the cryptocurrency you need to use. Allowing you to use Monero for any crypto transaction you might want to make!
Example, say I needed to pay someone 50.25 DOGE, but I only have Monero, this is what that would look like.
Purchase Giftcards and Prepaid Debit Cards with Cryptocurrency!
The following are a few websites where you can purchase various giftcards for common stores/services using cryptocurrency. You can also purchase prepaid Debit Cards from most of these providers such as Mastercard and sometimes VISA.
Some examples include: Amazon, Steam, Lyft, Uber, Grubhub and many, many more!
Coinsbee: https://coinsbee.com
CakePay: https://cakepay.com
Trocador Giftcards: https://trocador.app/en/giftcard
Monero Debit Cards!
While the above should help in most cases, sometimes you are buying from a platform that doesn't take giftcards or prepaid cards. Well, there is a service out there that gives you genuine 3D Secure Visa Debit Cards that you can purchase and top up using Monero.
NoKYCCards: https://nokyc.cards
I have personally tested NoKYCCards and can verify it works. These are the following scenarios I tested it in thus far.
-
Linked card to a Paypal account
-
Paid paypal user using funds from linked NoKYCCards debit card.
-
Purchased a $60 item from Stripe payment processor using the NoKYCCards debit card.
-
Reloaded the provisioned NoKYCCard with no issues.
These cards cost a bit of money to issue and top up, you can take a look at the various fees NoKYCCards charges here: https://nokyc.cards/fees
Maybe not the sort of thing you'd use for everything, but for services where the other options aren't available, this is a good tool to have under your belt!
Other Monero Debit Card services.
The following Monero Debit Card options are listed for convenience purposes, but have not been tested by me. Do your own research.
Anon Cards: https://paywithanon.com/index.html
Anon Cards seems to be a service similar to NoKYCCards, with the primary differences being that their cards expire after 60 days, they do not support 3D Secure (where as NoKYCCards does) and unlike NoKYCCards they CAN be added to Google/Apple Pay. They also do not seem to have nearly as high fees. So, if you want to pay with Google/Apple Pay or you're 100% positive that the merchant you're purchasing from doesn't require 3D Secure and you don't need the card to last more than 60 days, this could be a valid option for you!
Proxy Shops
A proxy shop in this context is a place where you send someone cryptocurrency along with information for the item you want to buy and they purchase the item on your behalf for a fee.
AnonShop: https://anonshop.app/
I have personally used this service a handful of times and have had no issues with it. Even the few times I have used it and things haven't worked out (always a fault of my own) he refunds me my full amount no problem.
Note: This shop is owned and operated by one guy, so sometimes things might be slower depending on demand and his own personal life situation.
The following proxy shops are listed for convenience purposes, but have not been tested by me. Do your own research.
XMRB4U: https://xmrb4u.com/
Monero.shopping: https://monero.shopping/
More Monero Resources.
KYC Not Me: https://kycnot.me A list of various cryptocurrencies exchanges and services which do not require KYC/AML Identity verification.
Monerica: https://monerica.com A vast directory of Monero services and resources.
Be especially mindful when browsing Monerica.
While Monerica is a great service and directory, keep in mind they take money for sponsorships and have a bit of a history for bias. Sometimes marking services as "scams" for little to no reason. Such as them marking the service Kyun as a scam, despite their reasoning being due to service issues beyond Kyun's control. While even I myself have called Kyun out for these issues in the past, they are by no means a scam.
Finally, if this article has given you value, consider donating to us.
Trocador allows you to donate any of the supported cryptocurrencies, and I will receive that donation in Monero.
Alternatively, you can send Monero directly to the following address at: 8BgWgTBqdFabCQom16f6ty4YCEGK9qrNvVvoHLh4eDt98LAXH77PkuydYZYs7U7PvN8qeNvgEPuYt8LxpNc7LRVsN1G4ygu
or you can support us on Unifans by clicking here.